Welcome to another Happy Inkin’ Thursday Blog Hop. Today we are working with a color challenge. I have to say that I find this one the most challenging because I try to come up with something that isn’t using the designer series paper. So this time I am using a DIY “embossed” background technique I learned from a fellow demonstrator, Audra Monk, and added my own twist. It’s probably not what you think…

Is it too early to talk about Easter? With the start of the Lenten season just around the corner, Easter isn’t all that far away. My Valentine’s Cards will be on time, I hope, so it’s time to transition to making cards for the next holiday. Now I know that’s actually St. Patrick’s Day, but I no longer have the stamp and punch bundle for that holiday, so Easter it is for today. Maybe I’ll work on coming up with a St Patrick’s Day card for a future Sunday blog.

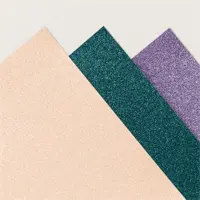
To make this card, I started with a 4-1/4″ x 11″ Berry Burst card base scored at 5-1/2″. I added a 4″ x 5-1/4″ piece of Three Color Glimmer paper in Highland Heather for my front mat. If you wish to save on card stock, use any die that is smaller than 3-1/2″ x 4-3/4″ (the size of the card front panel) and cut out the middle of this fun, sparkly glimmer paper.
I used the Easter Bunny Punch to cut eight (8) total bunnies, cutting at least one from each of the challenge colors. My 3-1/2″ x 4-3/4″ card front panel and the sentiment using the second largest (approximately 2-1/2″) Stylish Shapes circle die are cut from Fresh Freesia. I put a bunny in the center of the card and used liquid glue to adhere it to the card panel. I then added the other Easter Bunny Punch bunnies to the card randomly with liquid glue. Where I found blank spots on the edges, I added glue only to the part of the bunny that would adhere to the card. I used paper snips to trim off any part of the Easter Bunny Punch that was hanging off the edge of the card panel.

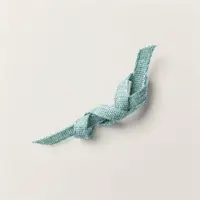
Using the Easter Bunny Stamp Set, I stamped a bunny using Tuxedo Black Memento ink on Fresh Freesia cardstock, then die cut the stamped image using the Stylish Shapes Dies second largest circle. I used the light Fresh Freesia Stampin’ Blends to color only the outer part of the left ear, the right ear and the belly. I used Stampin’ Seal on the back of the front card panel and adhered a 5″ piece of Lost Lagoon 1/4″ Bordered Ribbon to the card. I tied two (trying to change it up) faux bows next to each other on the right side of the ribbon and frayed the edges a little bit. I placed Stampin’ Dimensionals on the back of the Stylish Shapes circle and adhered it to the card over the Lost Lagoon ribbon. I then added five (5) Purple Fine Shimmer Gems to the card front, again just changing up my regular pattern.

I know that we are dedicated to our preferred adhesives, y’all, but I really think that liquid glue is best for adhering the front panel to the Three Color Glimmer Paper. My personal experience is that it adheres best. I added liquid glue to the back of my front panel and adhered it to the Highland Heather glimmer paper mat. I then added the matted panel to the front of the card with liquid glue.
For the inside sentiment panel, I cut a 4″ x 5-1/4″ Basic White panel. I stamped the Easter Bunny Stamp Set Easter eggs in Highland Heather ink, stamped off once, centered in the top third of the panel. I then used Gorgeous Grape ink to stamp the Easter Bunny Stamp Set Happy Easter sentiment over the eggs.

I stamped the sitting bunny using Tuxedo Black Memento ink in the bottom right corner and colored it with Fresh Freesia and Highland Heather Stampin’ Blends. Just because, I stamped the Easter Bunny Stamp Set “Hi” next to the bunny. I adhered the panel to the Berry Burst card base with liquid glue.
Using DSP on the envelope flap is my preferred flap decorating technique, but in this case I didn’t use any, so I improvised. I cut a 6″ x 2-1/4″ piece of Lost Lagoon cardstock and placed the Easter Bunny Stamp Set bird, carrot, butterfly and flower swag on a D block. I used Lost Lagoon ink to stamp the images starting on the right side with some elements off the edge of the cardstock. I turned the block 1/4 turn, inked again and stamped again. I did that one more time before reaching the end. With the Stampin’ Cut & Emboss machine and the cross hatch embossing folder from the Basics 3D Embossing Folders, I dry embossed the stamped cardstock. I then adhered the cardstock to the envelope flap with liquid glue.

For the front of the envelope, I used Shaded Spruce ink and stamped the Easter Bunny Stamp Set grass three times without reinking. I then stamped three butterflies in Gorgeous Grape, Fresh Freesia and Highland Heather to finish off the envelope front.
The Easter Bunny Stamp Set and the coordinating Easter Bunny Punch are in the 2023-2024 Annual Catalog and will be available until the end of April. If you want to use these for a card, I suggest buying early as we know that supplies can be limited as we get closer to the holiday.
Thank you for joining me for today’s blog hop. Amy Koenders is up next. Click the Next button or her name to go to her blog. If you missed stopping by a participant, click on her name in the list for her blog.

- Amy Koenders
- Mary Deatherage
- Karen Finkle
- Akiko Sudano
- Karen Ksenzakovic
- Tara Carpenter
- Terry Lynn Bright
- Carol Buckalew
- Nel Thames – This is me
I typically post card blogs on Sunday, Tuesday and Thursday. I’d be honored if you’d subscribe to my blog to receive an update when a new blog is posted.


Host Code
May 1 – May 31: Host Code: KGRFRDQK
If you do not already have a demonstrator, I’d be honored to be your Stampin’ Up! Demonstrator.
Use my host code when you order $50 (before tax and shipping) or greater and receive five (5) handmade cards and a variety of 6″ x 6″ double sided Designer Series Paper (a $20 value) FREE from me. You will also receive the monthly online tutorial. The May tutorial features the Adventurous Sky Bundle.
***Make sure that you can see my name, Nel Thames, on the final checkout page listed as your Demonstrator when you order so that you know that you’re ordering with me and you’ll get my rewards! If you forget to add the host code I am not able to add it for you due to privacy reasons. You can call Stampin’ Up! and requested that it be added. Thank you for understanding.

Retired Stampin’ Up! Products
My online Stampin’ Up! retired product store has been refreshed with additional products. I will be adding more retired products as I come across them. I have a variety of stamps, dies and embellishments. My stamps and dies are all gently used and most were purchased within the last two years (although some may be “vintage”). Dies might be on magnet cards as I did not start saving the original packaging until just recently. Designer Series Paper and embellishments are new in unopened packages unless otherwise stated.
Due to Stampin’ Up! policies, I can only ship to U. S. addresses.
Shop my online store here.
Subscribe to the April Paper Pumpkin – April 11 – May 10

Do you subscribe to Paper Pumpkin? Paper Pumpkin is a monthly subscription that provides a unique variety of paper projects for new and experienced crafters alike. Part of the fun of Paper Pumpkin is that the contents are a surprise every month.
MAY: The Best There Is
Subscribe 11 April–10 May
Make cards for Father’s Day and more to express your gratitude and admiration!
- Makes 9 cards: 3 each of 3 designs with 9 coordinating envelopes
- Precut paper pieces and butterfly designs
- Champagne foil images, sentiments, and labels
- Coordinating colors: Lost Lagoon, Moody Mauve, Basic Beige, Basic Gray
(Classic Stampin’ Spot), Basic Black, champagne foil
For more information
scan the QR code
Coordinates with the Country Woods Designer Series Paper (item 163393).
It’s easy to subscribe to Paper Pumpkin by clicking here! Supplies may be limited towards the end of the subscription period.
Starting in January 2024, Paper Pumpkin kits will coordinate each quarter and have a set of Add-On dies available for purchase while supplies last. You can find this quarter’s dies here. Please note you must be a current Paper Pumpkin subscriber to order the dies.


While I love the Perennial Lavender DSP, you certainly did think outside the box and DIDN’T use it! Way to go with the shadow bunnies. Very creative. Cute card for Easter, which will be here before you know it.
Thanks so much, Julie. Glad you stopped by.
Such a sweet card, Nell! Love how you created the shadow bunnies…great Easter card!
What a fun card – love all those punched bunyas!! 🙂
Thanks, Mary.
Fun easter card! I love the bunny background! TFS
Thanks, Tara.
Such a pretty Easter card! Love this bunny! 😊
Thank you. I love it too. I’m a huge fan of punches.
Nel, I thought sure we’d all be using the Perennial DSP but you fooled me! Cute card. I love the purple bunny inside.
Thanks, Karen. I tried to think outside of the box, but I do love that Perennial DSP.
Adorable card Nel. Those bunnies are so cute
Thanks so much, Karen.
Such a cute card Nel! Love the little bunnies. Perfect colors for Easter! 🙂
Thanks, Amy. 🙂