
Thank you for stopping by my blog today. I am excited to be participating in the Inkin’ Krew monthly blog hop. This month the theme is Merry Christmas or Happy Holidays. I chose to make something I’ve never made before – a slimline card. I hope you like it.

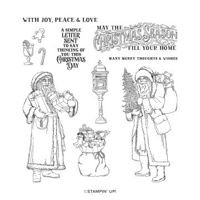
Before I started, I selected three pieces of the Traditions of St. Nick designer series paper. Oh my goodness this paper is beautiful! I just love the Saint Nick images and want to die cut him out and keep him LOL. The reverse side of the holiday paper is also beautiful and not at all holiday themed. So many lovely ornate designs in beautiful, rich colors. I can definitely see me running out of this paper. For today’s card I selected the Cherry Cobbler and Mossy Meadow ornate designs and the Basic White, Cherry Cobbler and Mossy Meadow holly paper. I avoided using a directional paper and I wanted a paper with a smaller design.
I used the circles from the Stylish Shapes die set. If you don’t have this set of circles, squares and sentiment banners I highly recommend it. This is a stand alone die set that can be used in so many ways. Plus, the dies have a stitched edge which I love because, well you might know this about me, I love texture on my cards.
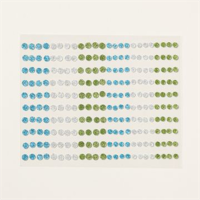
I used the 2nd smallest Stylish Shapes circle to die cut the Cherry Cobbler, the 2nd larges Stylish Shapes circle to cut the Mossy Meadow and the 3rd smallest Stylish Shapes circle for the white background with holly. I cut two of the same size circles from each paper. I then cut each circle in half using my paper trimmer and an upward cutting motion which pushes the circle into the trimmer rather that pull it away from the trimmer edge. I feel like cutting small items with an upward motion keeps them more secure during cutting.
Using my fav adhesive, liquid glue, I stacked the circles with the largest on the bottom and the smallest on the top and adhered them together with the half circles on the right side. I then adhered the other half of the circles to each other with the circles stacked on the left side. I repeated the right and left sides with the other two sets of half circles. So now I have 2 right sided half circle stacks and 2 left sided half circle stacks.
Since this is a slimline card, the cardbase is 8-1/2″ long by 7″ wide. The card is scored at 3-1/2″. I used an 8″ x 3″ piece of Basic White for the top layer of the card. I cut an 8-1/4″ x 3-1/4″ Mossy Meadow layer and embossed it with the Christmas Tidings embossing folder. The embossing folder is not long enough to emboss the whole length of the layer in one pass, but since the design on the embossing folder is not specifically directional I was able to turn the embossing folder and run the layer end through the Stampin’ Cut and Emboss machine again.

Before bringing out my fav liquid glue again, I arranged my half circles so that they curved along the length of the Basic White card panel. I put a right sided circle on top, then the bottom half (which is left sided) under the first, lining up the red circles. Then I added the third half circle to the top, this time lining up the Mossy Meadow edges of both circle groupings and then the fourth half circle on the bottom lining up the red. If I have fully confused you, see the photo of the card or the video tutorial and you can see how they line up. Now, I’m not putting them so they’re touching, but rather so they have a gap between top and bottom of about 1/8″. Once I determined placement and had them where I wanted them on the card, I glued them on one by one, leaving the previously mentioned gap.
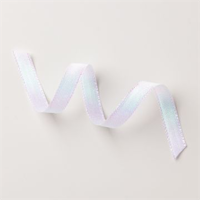
After gluing all my half circles down, I cut a 9″ piece of White 1/2″ Iridescent Ribbon and placed it down the middle of the card, covering the gap between the circles. I placed Stampin’ Seal on the back side of the panel and wrapped the ribbon over the edge of the basic white panel and onto the seal. I cut a 3/8″ x 7-3/4″ piece of Mossy Meadow and used liquid glue to adhere the Mossy Meadow centered on the ribbon.
I used the Stampin’ Cut and Emboss machine and the 2nd largest banner die to cut a Cherry Cobbler banner. I swiped my embossing buddy across the banner and stamped the sentiment from the Saint Nicholas stamp set with Versamark ink on the banner. I used the white embossing powder from the Basics Embossing Powders over the sentiment and tapped off the excess. I used the Heat Tool to melt the embossing powder while holding the banner with reverse tweezers. I allowed the sentiment to cool down before placing Stampin’ Dimensionals on the back and adhering the embossed sentiment to the card front.

I used liquid glue to adhere the basic white card layer to the embossed Mossy Meadow layer. I placed Stampin’ Dimensionals on the back of the front layer and adhered it to the card base. I used Basic White again on the inside with a Mossy Meadow mat. I stamped the second Saint Nicholas stamp set sentiment in Cherry Cobbler on the inside white layer and then stamped the drink, candy cane, gingerbread man stamp to two corners of the layer in Tuxedo Black Memento Ink. I dotted light Stampin’ Blends color in the small images – Crumb Cake for the gingerbread man, Cherry Cobbler for the candy cane and Wild Wheat for the drink. I colored the citrus fruit in the drink with light Lemon Lolly and the rind in dark Lemon Lolly. I adhered the Basic White layer to the Mossy Meadow mat with Stampin’ Seal and then adhered the entire piece to the card base with liquid glue.

Stampin’ Up! doesn’t have a slimline envelope but I was able to easily find a small pack on Amazon. I covered the flap of the envelope with the St. Nick designer series paper. For the envelope I used, the paper was about 10″ wide by 1-3/4″, then trimmed to size after I glued the paper to the flap. I stamped the mailbox on the front of the card in Tuxedo Black Memento ink.


Host Code
May 1 – May 31: Host Code: KGRFRDQK
If you do not already have a demonstrator, I’d be honored to be your Stampin’ Up! Demonstrator.
Use my host code when you order $50 (before tax and shipping) or greater and receive five (5) handmade cards and a variety of 6″ x 6″ double sided Designer Series Paper (a $20 value) FREE from me. You will also receive the monthly online tutorial. The May tutorial features the Adventurous Sky Bundle.
***Make sure that you can see my name, Nel Thames, on the final checkout page listed as your Demonstrator when you order so that you know that you’re ordering with me and you’ll get my rewards! If you forget to add the host code I am not able to add it for you due to privacy reasons. You can call Stampin’ Up! and requested that it be added. Thank you for understanding.

Thank you for stopping by my blog on the hop. You probably came to my blog from Carol Buckalew’s site, but if not you can click the BACK button to go to her blog. Click the NEXT button to visit Shirley Gentry.

Here is the list of Blog Hop participants:

- Ann Louise Fodgaard
- Mary Deatherage
- Tara Carpenter
- Carol Buckalew
- Nel Thames – This is me
- Shirley Gentry
- Karen Ksenzakovic
- Akiko Sudano
- Karen Finkle
- Amy Koenders
The Seasonal Sale Starts TODAY
Remember, the sale is November 14 – 16 only. Shop early for the best selection.


Loved seeing your creation in the hop today, Neil. Love your combination of papers and fun design. TFS
Thank you for stopping by Susan.
Beautiful!! I love this! 😊
Thank you so much, Akiko.
Really fun, non-traditional design, Nel! 🙂
Thanks, Carol. That’s exactly what I was going for.
Such a cool card Nel! Love the fun layout, great mix of designer papers too!
Thank you, Amy. I really enjoyed creating this card.
Great slim line card! I love the design! TFS
Thanks, Tara. I’m sure it won’t be my last slimline card.
Nel, I love slimline cards and this is a great one…especially the design.
Thanks so much, Karen.
Awesome card Nel 🙂 Love it!!
Thanks, Karen!
Wow – this card is REALLY cool! I love the modern look with the traditional paper! 🙂
Thank you so much Mary.