Happy and blessed Sunday y’all. Today’s card is as simple as you want or as fancy as you can make it. Well, technically I guess you could say that about all cards, right? As much as I want to be fancy with lots of layers I find that I don’t always have the sense of what looks good together. As I make more and more cards, I feel that I have settled into the more clean and simple cards.

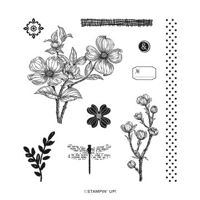
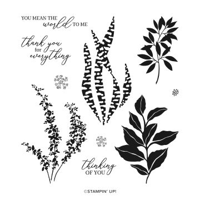
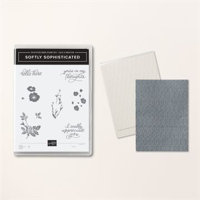
I used a few stamps from the Detailed Dogwood stamp set which you can earn FREE during Sale-a-bration with a $100 order. I didn’t originally order the Detailed Dogwood Stamp Set, but I’ve seen some lovely demonstrations with it and was happy to add it to my collection. I enjoyed using the lovely large Dogwood stamp as a background stamp today before I added card layers. So, let’s get started, shall we?
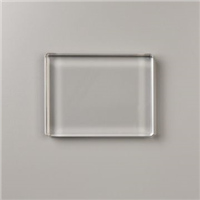
I selected a Basic White Thick card base cut at 4-1/4″ x 11″ and scored at 5-1/2″. This creates a tent card, but if you wish it to be a side opening card you can do that as well. I used Pebbled Path ink and stamped off three times for each Dogwood. I stamped randomly around the card, turning the card and stamping in different directions. When stamping near the top edge, I kept the cardstock folded to avoid stamping on the back. I used the cross hatched stamp, again in Pebbled Path ink stamped off three times, to fill in some open spaces. To finish off the front card base stamping, I stamped the small number (No.) stamp near each of the Dogwood stamps facing the same direction as the dog wood. Again, I did this with Pebbled Path ink stamped off three times.

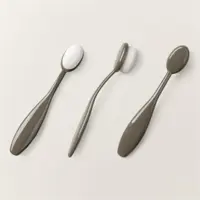
For the focal point I stamped the lovely Dragonfly from the Detailed Dogwood stamp set using Highland Heather ink. I LOVE those wings! A recent fact I learned – the SU! legal team has to review any writing on proposed stamp and DSP before it can be used in a product. Even this little Dragonfly had its time in front of the legal team :). I used a small amount of Lemon Lolly ink and a very light hand to ink blend over the Dragonfly. My goal was an almost undetectable brightness around the dragonfly. After ink blending, I added a bit of Wink of Stella to the dragonfly body – because, SPARKLE!
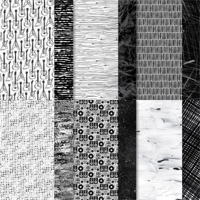
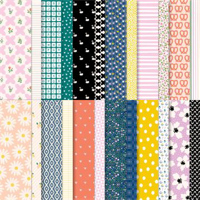
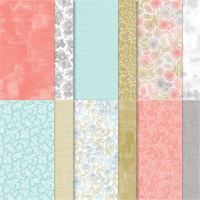
For the front card panel, I referenced a layout from Call me (Crafty) Al from way back in October 2022 #SUYSOct2022. I chose the Rock & Roll 12″ x 12″ Designer Series Paper which is entirely in black and white. As soon as I saw the layout I knew I wanted to do it in black and white. I selected two Rock & Roll black and white designer series paper patterns and adhered them to the Basic Black front panel with liquid glue. I added a third piece of Rock & Roll DSP to a piece of 3-1/8″ x 1-3/4″ black cardstock, making the right edges even. I adhered the large panel to the front of the card base with black Stampin’ Dimensionals. I did not adhere the smaller matted panel yet.

I used a piece of Basic Black card stock to create the sentiment. I stamped the Biggest Wish Stamp Set sentiment on the black card stock with VersaMark ink before covering it with white basics embossing powder. Once the stamped sentiment was covered with powder, I used the heat tool to melt the embossing powder. I like the mottled nature of the stamping for this card as it works really well with the DSP. If you desire a more solid embossing, you might want to stamp twice with VersaMark and sprinkle heavily with embossing powder.
I wrapped black and white baker’s twine around the left edge of the sentiment panel and tied it before trimming the tails. I adhered the small matted panel to the larger front panel making the right edge even with the card base. I used liquid glue on the left side adhering it to the card front panel and black Stampin’ Dimensionals on the right edge. I then added black Stampin’ Dimensionals to the back of the sentiment and adhered it to the front of the card over the DSP sentiment panel with the right edge even with the edge of the card base. Once all was adhered, I added three white Adhesive-Backed Sparkle Gems to the front of the card.

I cut a 4″ x 5-1/4″ piece of DSP for the inside mat. For the sentiment panel I used a piece of Basic White cardstock cut at 3-3/4″ x 5″. I stamped the long dotted strip from the Detailed Dogwood stamp set on the right side of the sentiment panel with – you guessed it – Pebbled Path ink, stamped off three times. For the inside sentiment I continued with the Biggest Wish stamp set and Tuxedo Black Memento ink and stamped the large friend sentiment. I adhered the panel to the DSP with Stampin’ Seal and then adhered the matted panel to the card base with liquid glue.

As I most often do, I used liquid glue to attach the Rock & Roll DSP to the envelope flap. I stamped the small flowering branch from the Detailed Dogwood Stamp Set partially on the front of the envelope with Pebbled Path ink, stamped off three times. 🙂


Host Code
May 1 – May 31: Host Code: KGRFRDQK
If you do not already have a demonstrator, I’d be honored to be your Stampin’ Up! Demonstrator.
Use my host code when you order $50 (before tax and shipping) or greater and receive five (5) handmade cards and a variety of 6″ x 6″ double sided Designer Series Paper (a $20 value) FREE from me. You will also receive the monthly online tutorial. The May tutorial features the Adventurous Sky Bundle.
***Make sure that you can see my name, Nel Thames, on the final checkout page listed as your Demonstrator when you order so that you know that you’re ordering with me and you’ll get my rewards! If you forget to add the host code I am not able to add it for you due to privacy reasons. You can call Stampin’ Up! and requested that it be added. Thank you for understanding.

Sale-A-Bration ends February 29, 2024
Before I let you go, let me remind you that Sale-A-Bration ends February 29. NEW items were added to the FREE Sale-A-Bration offerings at both the $50 (before tax and shipping) and $100 (before tax and shipping) levels on February 1, so if even if you’ve already shopped check them out again. Remember, if your order is $150 or more you’ll not only qualify for FREE Sale-A-Bration items, you’ll receive your own Stampin’ Rewards AND my ordering special of any item up to $10 from any current catalog including the online exclusives. Take a look at the newly added Sale-A-Bration items.
Free at the $50 level

Price: $0.00


Price: $0.00


Free at the $100 level

When placing your order, remember to use the current host code above to also receive your FREE item from me. FREE is fabulous!! Items may sell out or become unavailable before the end of the sales period, so don’t delay if there’s something you’d like to get FREE!
Thank you!
Thank you so much for coming to my blog today. I hope you make this card – if you do, please tag me at #StampWithNel.
I typically post card blogs on Sunday, Tuesday and Thursday and email a newsletter on Wednesdays. I very much appreciate every visitor and every comment. I hope you found something here that encourages you to return for my next blog post. It’s my pleasure to help you nurture your creativity.
Join me for a free live cardmaking class every Sunday at 6 pm central. You may view the class live on Facebook or YouTube. You can find my Facebook page here and the Stamp With Nel YouTube channel (@stampwithnel) here. I invite you to join me for the class or watch it on the replay.
Retired Stampin’ Up! Products
My online Stampin’ Up! retired product store has been refreshed with additional products. I will be adding more retired products as I come across them. I have a variety of stamps, dies and embellishments. My stamps and dies are all gently used and most were purchased within the last two years (although some may be “vintage”). Dies might be on magnet cards as I did not start saving the original packaging until just recently. Designer Series Paper and embellishments are new in unopened packages unless otherwise stated.
Due to Stampin’ Up! policies, I can only ship to U. S. addresses.
Shop my online store here.
Subscribe to the April Paper Pumpkin – April 11 – May 10

Do you subscribe to Paper Pumpkin? Paper Pumpkin is a monthly subscription that provides a unique variety of paper projects for new and experienced crafters alike. Part of the fun of Paper Pumpkin is that the contents are a surprise every month.
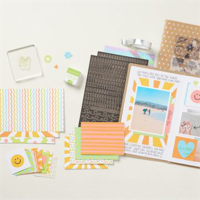
MAY: The Best There Is
Subscribe 11 April–10 May
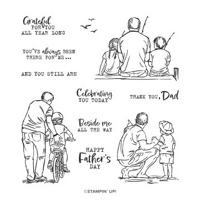
Make cards for Father’s Day and more to express your gratitude and admiration!
- Makes 9 cards: 3 each of 3 designs with 9 coordinating envelopes
- Precut paper pieces and butterfly designs
- Champagne foil images, sentiments, and labels
- Coordinating colors: Lost Lagoon, Moody Mauve, Basic Beige, Basic Gray
(Classic Stampin’ Spot), Basic Black, champagne foil
For more information
scan the QR code
Coordinates with the Country Woods Designer Series Paper (item 163393).
It’s easy to subscribe to Paper Pumpkin by clicking here! Supplies may be limited towards the end of the subscription period.
Starting in January 2024, Paper Pumpkin kits will coordinate each quarter and have a set of Add-On dies available for purchase while supplies last. You can find this quarter’s dies here. Please note you must be a current Paper Pumpkin subscriber to order the dies.


Great design – and fun that you’re “finding your style”! 🙂
Thanks Mary.
Such a cool design! Love the black and white color scheme too! 🙂
Thank you, Amy. I liked using the Black and White today.