Hello and a happy and blessed Sunday, y’all. I hope you have had a relaxing weekend and, if your weather was as nice as ours was on Saturday, that you were able to open some windows and enjoy the fresh air.
I learned to make today’s fun fold during an online event I attended last weekend. Even as a demonstrator I attend the events of other demonstrator friends to learn new tips and tricks that I can share with y’all. I learned some interesting things and certainly will give credit where credit is due. This particular card I learned to make from Anne Marie Hile.
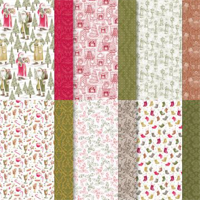
I was going through my DSP this week to pull out the retired items, and I realized that the Traditions of St. Nick is still a current paper. You might remember the beautiful “B” side of this paper with the lovely ornate designs that remind me of Victorian wallpaper. I’m so glad to have another opportunity to create with this DSP.

My base is Copper Clay cut at 5-1/2″ x 10-3/4″. I scored at 1-1/4″, 2-1/4″, 3-1/4″, 7-1/2″, 8-1/2″ and 9-1/2″. I burnished each fold with a bone folder. I have to say I didn’t always use this helpful tool, but it really is helpful to make crisp creases. My front crease is a mountain fold, then a valley next and a mountain at the back side.

I used Pebbled Path card stock cut two mats at 1-1/8″ x 5-1/4″. Next I cut two DSP pieces at 1″ x 5″. Now this will be different than usual – I adhered the DSP to the mat using liquid glue with the inside edge even to the inside edge of the mat. One DSP will be even with the right side and the other even with the left side. The matted panels are then adhered to the front fold with liquid glue, even with the inside edge of the front edge. With all of the front mats, you want to keep an even edge around the DSP and then the mat when applying it to the card front. I adhered the Pebbled Path inside DSP to the Pebbled Path mat with liquid glue, then adhered the matted panel to the inside of the card.
I cut two Basic White squares for my focal piece. On one, I stamped the branch circle in Copper Clay with the open edge of the branches towards the bottom left and used the smaller round Encircled in Nature Dies to die cut the inside of the circle out. I saved it for later because I think I can use it in another project. Placing the second XXX Basic White panel behind the first, I made a light pencil mark inside the cut out on the left side so I could place the Encircled in Nature tree stamp in the general area I wanted it.

I prepared the Encircled in Nature Stamp Set trees with Old Olive ink all over, then used a sponge dauber to dab Mossy Meadow randomly around the stamp. I then stamped the image using the pencil mark as a guide for placement. I stamped the moon and stars in Pebbled Path ink, stamped off tice.
Before adhering the two panels together, I erased the penciled placement lines. Then I adhered the two panels together with liquid glue, aligning the trees in the branch circle. I used the Encircled in Nature Dies to die cut the set of five trees in Old Olive and the smaller trees in Mossy Meadow. I used my sponge dauber again to add some Mossy Meadow ink very lightly onto the Old Olive trees. I do think that sponge blending before I die cut would have worked as well, so I may try that in the future.

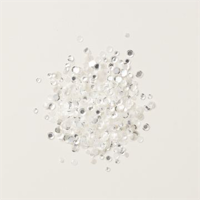
I used very small dots of liquid glue on the back of the Mossy Meadow (smaller) trees and adhered them to the front panel at the center bottom. With small dots of liquid glue again, I adhered the Old Olive trees to the front of the card aligning the largest tree along the left side of the branch leaf. I added three loose silver sequins to the front of the card with liquid glue (one of the few non-adhesive backed embellishments Stampin’ Up! has). I placed liquid glue on the edges of the Basic White panel and adhered the whole panel to the front folds. I did not want to use too much glue as I did not want to mistakenly adhere anything closed.
Clearly I don’t have any place to write a note on this card. The sentiment panel and mat is placed on the back of this fun fold card. I stamped the Encircled in Nature Stamp Set sentiment in Copper Clay in at the top center of the panel and then stamped the single large tree in the bottom right with Old Olive ink. I used a blending brush and light Mossy Meadow ink around the tree. I adhered a piece of 1/4″ x 5″ DSP to the left side of the sentiment panel with liquid glue. I used Stampin’ Seal to adhere the sentiment panel to the Pebbled Path mat, then adhered the matted sentiment to the back of the card with liquid glue.

On the envelope flap I adhered a 6″ x 2-1/4″ piece of Traditions of St. Nick DSP with liquid glue and then trimmed it with paper snips. I used Mossy Meadow ink and the Encircled in Nature Stamp Set large tree and stamped three times on the front left of the envelope without stamping off.
I’m so glad you stopped by today and I hope you enjoyed today’s card. I invite you to join me for a free Facebook Live Cardmaking Class every Sunday at 6 pm CST. Today’s card is the card I will make on the Stamp with Nel Facebook Live cardmaking class tonight (Sunday, February 25) at 6 pm CST. You can find my Facebook page here. I upload the recorded video to my YouTube channel here the same evening. I invite you to join me for the class or watch it on the replay.
Supply List:
Price: $12.50


Host Code
May 1 – May 31: Host Code: KGRFRDQK
If you do not already have a demonstrator, I’d be honored to be your Stampin’ Up! Demonstrator.
Use my host code when you order $50 (before tax and shipping) or greater and receive five (5) handmade cards and a variety of 6″ x 6″ double sided Designer Series Paper (a $20 value) FREE from me. You will also receive the monthly online tutorial. The May tutorial features the Adventurous Sky Bundle.
***Make sure that you can see my name, Nel Thames, on the final checkout page listed as your Demonstrator when you order so that you know that you’re ordering with me and you’ll get my rewards! If you forget to add the host code I am not able to add it for you due to privacy reasons. You can call Stampin’ Up! and requested that it be added. Thank you for understanding.

Sale-A-Bration ends Thursday February 29
Before I finish, let me remind you that Sale-A-Bration ends on Thursday February 29 – now is the time to get more of your favorite FREE Sale-A-Bration items.
Free with a $50 purchase – but only until February 29, 2024.
- Price: $0.00
- Price: $0.00
- Price: $0.00
- Price: $0.00
- Price: $0.00
- Price: $0.00
- Price: $0.00
- Price: $0.00
- Price: $0.00
- Price: $0.00
- Price: $0.00
- Price: $0.00
- Price: $0.00
- Price: $0.00
- Price: $0.00
- Price: $0.00
- Price: $0.00
- Price: $0.00
- Price: $0.00
Free with a $100 purchase until Sale-A-Bration Ends on February 29, 2024
- Price: $0.00
- Price: $0.00
- Price: $0.00
- Price: $0.00
- Price: $0.00
Retired Stampin’ Up! Products
My online Stampin’ Up! retired product store has been refreshed with additional products. I will be adding more retired products as I come across them. I have a variety of stamps, dies and embellishments. My stamps and dies are all gently used and most were purchased within the last two years (although some may be “vintage”). Dies might be on magnet cards as I did not start saving the original packaging until just recently. Designer Series Paper and embellishments are new in unopened packages unless otherwise stated.
Due to Stampin’ Up! policies, I can only ship to U. S. addresses.
Shop my online store here.
Subscribe to the April Paper Pumpkin – April 11 – May 10

Do you subscribe to Paper Pumpkin? Paper Pumpkin is a monthly subscription that provides a unique variety of paper projects for new and experienced crafters alike. Part of the fun of Paper Pumpkin is that the contents are a surprise every month.
MAY: The Best There Is
Subscribe 11 April–10 May
Make cards for Father’s Day and more to express your gratitude and admiration!
- Makes 9 cards: 3 each of 3 designs with 9 coordinating envelopes
- Precut paper pieces and butterfly designs
- Champagne foil images, sentiments, and labels
- Coordinating colors: Lost Lagoon, Moody Mauve, Basic Beige, Basic Gray
(Classic Stampin’ Spot), Basic Black, champagne foil
For more information
scan the QR code
Coordinates with the Country Woods Designer Series Paper (item 163393).
It’s easy to subscribe to Paper Pumpkin by clicking here! Supplies may be limited towards the end of the subscription period.
Starting in January 2024, Paper Pumpkin kits will coordinate each quarter and have a set of Add-On dies available for purchase while supplies last. You can find this quarter’s dies here. Please note you must be a current Paper Pumpkin subscriber to order the dies.


Just beautiful – and a really cool fold, too! Enjoyed the video, too! 🙂
Pretty card Nel! Love the wreath and those little die cut trees! 🙂
Thanks so much Amy.