Hello and welcome to my Tuesday blog. Today’s blog will be slightly different as I will be providing you with three card designs to help you use up retiring Designer Series Paper in order to make room for the new offerings available May 1. I try to be a one in, one out kind of person but that REALLY doesn’t work in my craft room.
For today, I’m showing you three cards that use retiring Stampin’ Up! Designer Series Paper prominently featured on the card. In addition to Designer Series Paper, I also used some retiring Specialty Papers for these cards.

First up is a very easy pinwheel card which you may have seen before. I remember how amazed I was when I first saw this design that it went together so simply. I like this design for using up small scraps of paper – you only need a 1-1/4″ x 5″ strip of each design to make this design. I’ve seen another version of this card that will be my Thursday blog post. This card is made of two different patterns of Just Kiddin’ Designer Series paper cut at 1-1/4″ x 1-1/4″. The base of the pinwheel is 2-5/8″ x 2-5/8″ (2 pcs).

I used enhanced the center lines on my grid paper to help me make the pinwheel base straight. I then started by adhering one square of pattern 1 with a small dot of glue on the top corner only. I left a small margin of cardstock showing around my square. I turned the pinwheel base to the next point, and adhered a pattern 2 paper leaving a similar margin around the edge and overlapping the first piece. I continued around the pinwheel alternating pattern 1 and pattern 2 pieces, leaving a small margin and overlapping the pieces, until I came to the final piece. For this piece I lifted up the corner of the first piece I laid down and slid piece 8 under it. I added some liquid glue under piece one and adhered the piece down overlapping piece 8.

Once the pinwheel is finished, I adhered it to a panel of Berry Burst with Stampin’ Dimensionals. Although I did not dry emboss this panel, I would do so on future cards as I love a good embossing folder 🙂 I adhered the panel of Berry Burst to the Berry Burst card base.

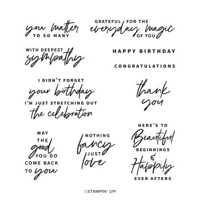
I added a Berry Burst sentiment from the Something Fancy Stamp Set stamped on Basic White and die cut with the Something Fancy Dies. I cut a decorative sentiment banner from the Just Kiddin’ designer series paper. I used liquid glue to adhere the two sentiment banners together and Stampin’ Dimensionals to adhere the sentiment to the front of the card. I added five Basic Rhinestone gems to the front of the card.
For the inside panel, I adhered a 1/2″ strip of Just Kiddin’ designer series paper to the card panel. I stamped another Something Fancy Stamp Set sentiment with Berry Burst ink. I adhered the Basic White inside panel to the card base with adhesive.
I used the star pattern from the Just Kiddin’ designer series paper to decorate the envelope for this card. I encourage you to use any stamp to decorate the front of the card – I totally forgot to do it on the live!

My second card is called a book fold card, but it’s not like any book fold I’ve seen. I might go so far as to call it a faux book fold. You won’t believe how easy this card is to make.
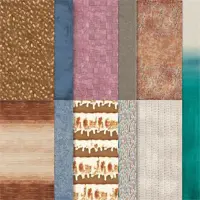
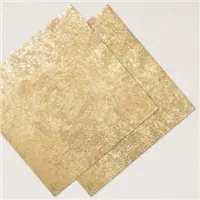
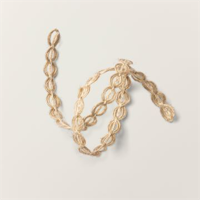
To start, I cut a piece of Earthen Elegance designer series paper (retiring) at 4-1/4″ x 5-1/2″ and a piece of Copper Clay Luster Specialty Paper (retiring) at 5-1/2″ x 5″, then scored at 4-1/4″ which provides for a 3/4″ fold over. I used Natural 1/4″ Wavy Trim (retiring) along the book fold edge and adhered it on the underside with Stampin’ Seal+. On the video I used Stampin’ Seal+ to adhere the designer series paper to the underside of the book fold, and then supplemented with liquid glue to adhere the edges.


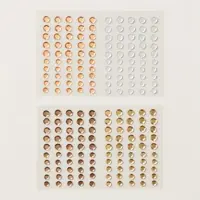
I used the Heartfelt Hexagon Punch (expected back in stock on May 13) to make a hexagon cutout on the front right side of the Earthen Elegance Designer Series Paper. I used a 4″ x 5-1/4″ piece of Basic White cardstock as a sentiment panel and stamped the Something Fancy Cling Stamp Set sentiment in Copper Clay ink, closing the front panel and using the hexagon as a guide for where to stamp. I added three 2023-2025 In Color Dots in Copper Clay to the front of the card, including one on the sentiment panel through the hexagon cut out.
I cut a piece of 1/2″ x 5-1/4″ Distressed 12″ x 12″ Gold Specialty Paper (retiring) and adhered it to the left side of the sentiment panel with liquid glue. I then adhered the Basic White sentiment panel to the card base with Stampin’ Seal+. I added Distressed Gold Specialty Paper to the envelope flap and stamped pampas grass on the envelope front with Pebbled Path ink. Easy, right??

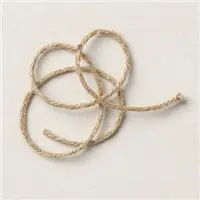
Card 3 starts out exactly the same as card two – a faux book fold made of Copper Clay 12″ x 12″ Luster Specialty Paper and Earthen Elegance 12″ x 12″ Designer Series Paper. Instead of cutting a hexagon in the paper, I used more of the 2023 – 2025 In Color Luster Specialty Paper in Copper Clay, Wild Wheat, Boho Blue and Pebbled Path. I pulled two threads from the Silver-Threaded Twine (retiring) and wrapped them around the book fold edge twice before tying a bow. I then adhered the Earthen Elegance Designer Series Paper to the underside of the book fold with liquid glue.

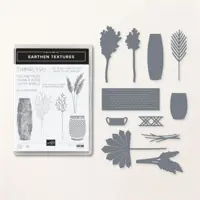
I used the 2nd largest Radiating Stitches Dies rectangle for the front panel, then built my focal point on the front panel using the Earthen Textures dies. For card 2 and 3, I used the same piece of designer series paper. The back side of that paper is ombre from a speckled Gray Granite to Pretty Peacock. One of my scrap pieces was a light Pretty Peacock color and I used it on card 3. For the sentiment I stamped Happy Birthday from the Something Fancy Stamp Set in Pebbled Path ink. I added the sentiment to the front of the card with Stampin’ Dimensionals, then adhered the panel to the front of the card with Stampin’ Dimensionals as well. I finished off the front with three Copper Clay Neutrals Adhesive-Backed Sequins.


For the inside panel, I stamped the pampas grass in Copper Clay, stamped off once. I then adhered the Basic White sentiment panel to the Copper Clay 2023 – 2025 In Color Luster Paper card base. I used Earthen Elegance Designer Series Paper on the envelope flap and stamped the front of the envelope with the short vase in Copper Clay ink and two different filler stamps in Pebbled Path ink.

And that’s it – three cards to help you reduce your stash (admit it, it’s a stash) of retiring designer series paper to make room for the new DSP you know you want! Enjoy using it all up and getting more 😉
Thank you!
Thank you so much for coming to my blog today. I hope you make this card – if you do, please tag me at #StampWithNel.
I typically post card blogs on Sunday, Tuesday and Thursday and email a newsletter on Wednesdays. I very much appreciate every visitor and every comment. I hope you found something here that encourages you to return for my next blog post. It’s my pleasure to help you nurture your creativity.
Join me for a free live cardmaking class every Sunday at 6 pm central. You may view the class live on Facebook or YouTube. You can find my Facebook page here and the Stamp With Nel YouTube channel (@stampwithnel) here. I invite you to join me for the class or watch it on the replay.
Truly the Last Chance for Retiring Products!

The current Annual Catalog and January-April Mini Catalog are ending soon and the Last Chance Lists, telling us which products are retiring and will no longer be available after April 30th, are available. Some products are now discounted by up to 60%! Click here to shop the retiring products online.
The easiest way to see which items are still in stock at any time is to visit my online store.
While it's always sad to see the end of any catalog with lots of retiring products, you can be sure Stampin' Up! has lots of lovely NEW products ready for us in the 2024-25 Annual Catalog, launching in May!
New May Kits
Two new kits became available on May 1. Have you seen them?

Kit includes:
* Predesigned projects
* Step-by-step instructions
* Precut pieces (No prep work! Get right to crafting)
* Make 9 cards
* 9 printed card bases
* 9 printed envelopes
* Folded card: 5-1/2″ x 4-1/4″ (14 x 10.8 cm)
* Printed die-cut images and labels
* Adhesive-backed sparkle gems
* Enough adhesive to complete projects
Product colors: Calypso Coral, Daffodil Delight, Flirty Flamingo, Old Olive, Petal Pink, Pretty Peacock
The second kit released this month is City Sights. I really like this kit – it’s in neutral colors which are the colors I lean towards, but there’s still a bit of bling.

Kit includes:
* City Sights Photopolymer Stamp Set
* Pebbled Path Stampin’ Spot
* Predesigned projects
* Step-by-step instructions
* Precut pieces (No prep work! Get right to crafting)
* Make 8 cards: 4 each of 2 designs
* 8 printed card bases
* 8 printed envelopes
* Folded card: 5-1/2″ x 4-1/4″ (14 x 10.8 cm)
* Printed shaped die cuts and printed sentiments
* Corrugated cardstock accent pieces
* Copper metallic embellishments
* Enough adhesive to complete projects
Product colors: Basic Beige, Basic Black, Boho Blue, Copper Clay, Misty Moonlight, Pebbled Path
Click on either photo for more information and to purchase these kits from my online store. Remember to use my current host code W9KV3SN2 to receive my ordering bonuses for orders over $50. If your order is $150 or over, you do not need to use the code since you’ll get your own Stampin’ Rewards AND my ordering bonuses. PLUS orders over $50 guarantee you a 2024-2025 Annual Catalog from me.


Sale: $11.25
Price: $12.50
Sale: $7.70
Price: $11.00


Host Code
May 1 – May 15 Host Code: KGRFRDQK
If you do not already have a demonstrator, I’d be honored to be your Stampin’ Up! Demonstrator.
Use my host code when you order $50 (before tax and shipping) or greater and receive five (5) handmade cards and a variety of 6″ x 6″ double sided Designer Series Paper (a $20 value) FREE from me. You will also receive the monthly online tutorial. The May tutorial features the Adventurous Sky Bundle.
***Make sure that you can see my name, Nel Thames, on the final checkout page listed as your Demonstrator when you order so that you know that you’re ordering with me and you’ll get my rewards! If you forget to add the host code I am not able to add it for you due to privacy reasons. You can call Stampin’ Up! and requested that it be added. Thank you for understanding.


Beautiful cards! I love that Pinwheel – and it was fun watching you make it, too! 🙂
Love these, Nel. Thanks for sharing—I do have a stash but these ideas will help me use some of it up!
Glad I could help you use it up, Susan 😉
Great cards Nel! Love the way that you’ve used the pretty designer papers. 🙂
Thanks so much, Amy.