
Hello and welcome to my favorite day of the week – Happy Inkin’ Thursday Blog Hop day!

If you read my blog on Tuesday you know that today the blog hop krew is working with a color challenge.

I used this same color palette on Tuesday to make an Easter card, but today I’m making a Holy Cow! card. The layout is similar to Tuesday’s card, so let’s get to it.
I used the Stylish Shapes Dies smallest square to die cut one square each of Lemon Lolly, Fresh Freesia and Balmy Blue. With a pencil, I lightly drew a line down the center of the panel at 7/8″ and used the line to keep the squares straight while I lined them up end to end on the Petal Pink panel, adhereing them with liquid glue. I adhered the Petal Pink panel on a 3-1/2″ x 4-1/2″ Fresh Freesia panel about 1/4″ in from the left side. Using liquid glue again, I adhered the Fresh Freesia panel to a 3-3/4″ x 4-3/4″ Lemon Lolly mat.

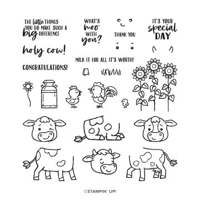
With the Stampin’ Cut & Emboss Machine and the Stylish Shapes Dies, I die cut the second largest circle for my focal point. I stamped twelve (12) single flowers around the outside edge of the circle with Tuxedo Black Memento ink and colored them with Lemon Lolly, Balmy Blue, Bubble Bath and Fresh Freesia Stampin’ Blends. Next I stamped a cow face in the center of the circle with Tuxedo Black Memento ink and colored the forelock in light Balmy Blue Stampin’ Blends and the inner ear and muzzle in light Petal Pink Stampin’ Blends.
I added the 6th smallest Deckled Circle of Vellum card stock behind the stamped circle and adhered them to each other with liquid glue. I added a Z of Bubble Bath 3/8″ ribbon from the 3/8″ Sheer Ribbon Combo Pack to the back of the circle using Stampin’ Seal to adhere it. I added Stampin’ Dimensionals to the back of the circle and auditioned it on the card base at the bottom right of the front card panel. I wanted the bottom edge of Vellum even with the card panel and the right edge even with the Bubble Bath card edge. Once the circle was where I wanted it, I removed the Stampin’ Dimensionals covers and secured the circle to the front card panel.

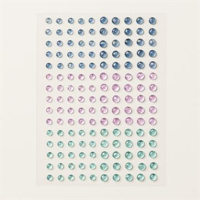
With Tuxedo Black Memento ink, I stamped the Cutest Cows Stamp Set Holy Cow! sentiment on Bubble Bath cardstock. A side note – I’m not a huge professional baseball fan, but I grew up in Chicago when Harry Caray was a Chicago Cubs announcer and vividly remember him saying “Holy Cow!”. Back to the card making – I used the second longest Stylish Shapes Dies sentiment banner to die cut the sentiment and then adhered the sentiment to the front panel with Stampin’ Dimensionals. I added Stampin’ Dimensionals to the back of the front panel and adhered it to the Bubble Bath card base. I finished the front of the card by adding three Fresh Freesia gems to the card front.

For the inside, I used a Cutest Cows Stamp Set sentiment as well as the milk jug and that darling rooster. I colored the Milk Jug with gray granite Stampin’ Blends, adding a little Basic Gray watercolor pencil for a little darker shading. I love the little rooster colored with Lemon Lolly, Bubble Bath and Fresh Freesia Stampin’ Blends. As I usually do, I added Stampin’ Seal to the Basic White sentiment panel and adhered it to the Lemon Lolly mat. I then used liquid glue to adhere the matted panel to the card base. I fixed an ink smudge on my Lemon Lolly mat by adding a thin strip of Lemon Lolly on the right of the sentiment panel.

I stamped the envelope flap with three different cow heads in Balmy Blue, Bubble Bath and Lemon Lolly ink. I added a single flower to the front of the envelope and used the Balmy Blue watercolor pencil to color the petals. I used a Blender Pen to grab some color from the petals and added it to the center of the flower.
That’s it for this card. I hope you’ll make one and tag me at #stampwithnel. I think this would make a great new baby card in these lovely pastel colors.
Thank you for joining me for today’s blog hop. Amy Koenders is up next. Click the Next button or her name to go to her blog. If you missed stopping by a participant, click on her name in the list for her blog.

- Amy Koenders
- Mary Deatherage
- Jaimie Babarczy
- Karen Finkle
- Akiko Sudano
- Karen Ksenzakovic
- Tara Carpenter
- Terry Lynn Bright
- Carol Buckalew
- Nel Thames – This is me
I typically post a new card blog on Sunday, Tuesday and Thursday and email a newsletter on Wednesdays. I’d be honored if you’d subscribe to my blog to receive an update when a new blog is posted and to receive my weekly newsletter.
Thank you to my 100th subscriber
I’ve reached 100 subscribers – LS was was my 100th subscriber and received the Cane Weave Embossing Folder. Thank you to all my subscribers – I appreciate each and every one of you.
If you’re not already a blog and/or newsletter subscriber please sign up today to receive my blog updates and/or my weekly newsletter. Please feel free to share my blog with your crafty friends.
Today’s Supply List:


Host Code
May 1 – May 31: Host Code: KGRFRDQK
If you do not already have a demonstrator, I’d be honored to be your Stampin’ Up! Demonstrator.
Use my host code when you order $50 (before tax and shipping) or greater and receive five (5) handmade cards and a variety of 6″ x 6″ double sided Designer Series Paper (a $20 value) FREE from me. You will also receive the monthly online tutorial. The May tutorial features the Adventurous Sky Bundle.
***Make sure that you can see my name, Nel Thames, on the final checkout page listed as your Demonstrator when you order so that you know that you’re ordering with me and you’ll get my rewards! If you forget to add the host code I am not able to add it for you due to privacy reasons. You can call Stampin’ Up! and requested that it be added. Thank you for understanding.

Retired Stampin’ Up! Products
My online Stampin’ Up! retired product store has been refreshed with additional products. I will be adding more retired products as I come across them. I have a variety of stamps, dies and embellishments. My stamps and dies are all gently used and most were purchased within the last two years (although some may be “vintage”). Dies might be on magnet cards as I did not start saving the original packaging until just recently. Designer Series Paper and embellishments are new in unopened packages unless otherwise stated.
Due to Stampin’ Up! policies, I can only ship to U. S. addresses.
Shop my online store here.
Subscribe to the April Paper Pumpkin – April 11 – May 10

Do you subscribe to Paper Pumpkin? Paper Pumpkin is a monthly subscription that provides a unique variety of paper projects for new and experienced crafters alike. Part of the fun of Paper Pumpkin is that the contents are a surprise every month.
MAY: The Best There Is
Subscribe 11 April–10 May
Make cards for Father’s Day and more to express your gratitude and admiration!
- Makes 9 cards: 3 each of 3 designs with 9 coordinating envelopes
- Precut paper pieces and butterfly designs
- Champagne foil images, sentiments, and labels
- Coordinating colors: Lost Lagoon, Moody Mauve, Basic Beige, Basic Gray
(Classic Stampin’ Spot), Basic Black, champagne foil
For more information
scan the QR code
Coordinates with the Country Woods Designer Series Paper (item 163393).
It’s easy to subscribe to Paper Pumpkin by clicking here! Supplies may be limited towards the end of the subscription period.
Starting in January 2024, Paper Pumpkin kits will coordinate each quarter and have a set of Add-On dies available for purchase while supplies last. You can find this quarter’s dies here. Please note you must be a current Paper Pumpkin subscriber to order the dies.


Great design Nel!
Thank you, Terry Lynn.
How adorable! Love this little cow! TFS! 🙂
Thank you, Carol.
How cute! Love it! 😊
Thank you Akiko
How cute is that! I especially like the inside. TFS.
Thank you very much, Karen.
What a sweet little moo-cow!! Love it!
Thanks Mary. I’m quite fond of this set 🙂
Adorable card Nel. Love that cow, it’s just too cute. Love how you surrounded it with the flowers too.
Thanks Karen.
Such a fun card! Love the little cow surrounded by the flowers! 🙂
I’m so glad you stopped by, Amy. 🙂